Imposition Printing (Professional)
On this page
5.7 Imposition Printing (Professional)
Imposition combines multiple records at output without changing single-card design. Both methods are single-sided and require feature/print permissions. Sample artwork tests geometry; production contents come from the actual layout.
5.7.1 Two-Up Printing
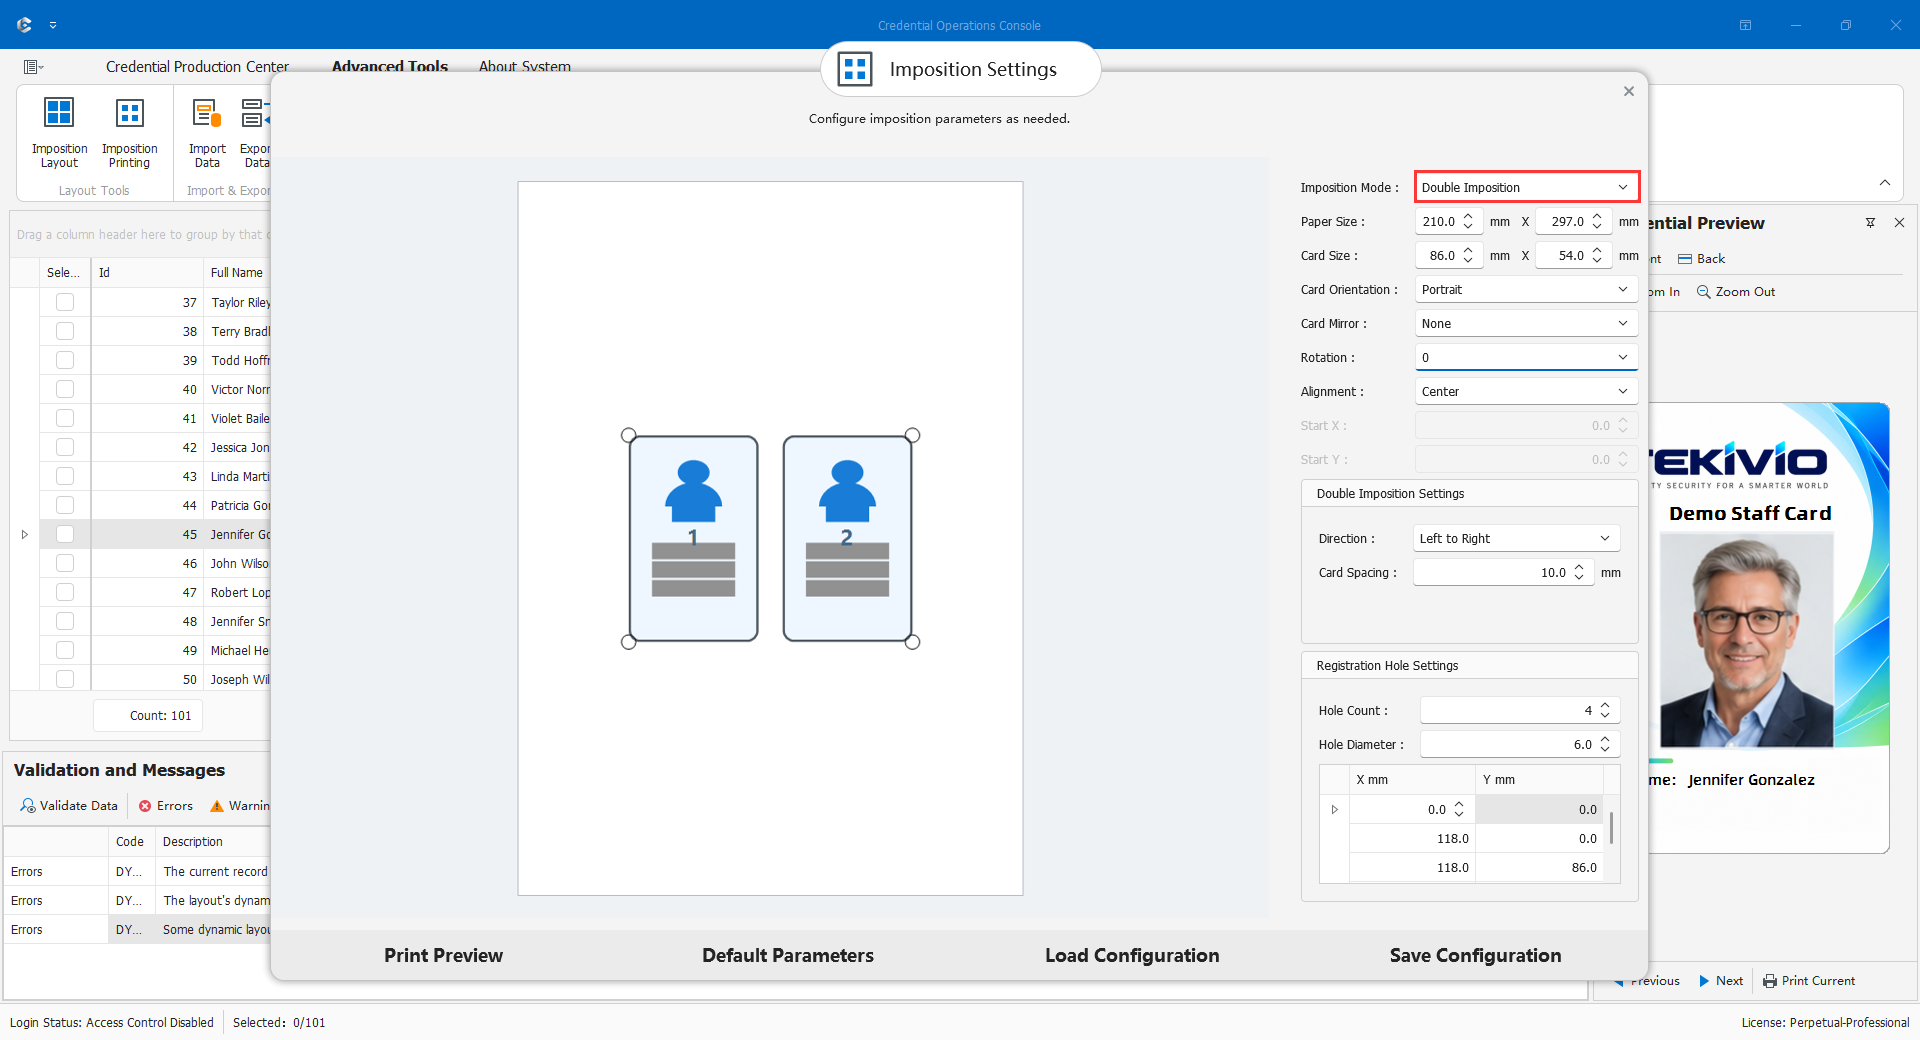
Arrange two cards horizontally or vertically. Configure paper, card orientation, gap, and overall location, save parameters, then check people and run Imposition Printing. Five records require three groups; the last contains one card in the first slot and a blank second slot, not a duplicate or an unselected person. Group count and copies are separate. Trial order, gap, trim, and feed direction; portrait cards and whole-group 90-degree rotation differ.
5.7.2 Free Imposition
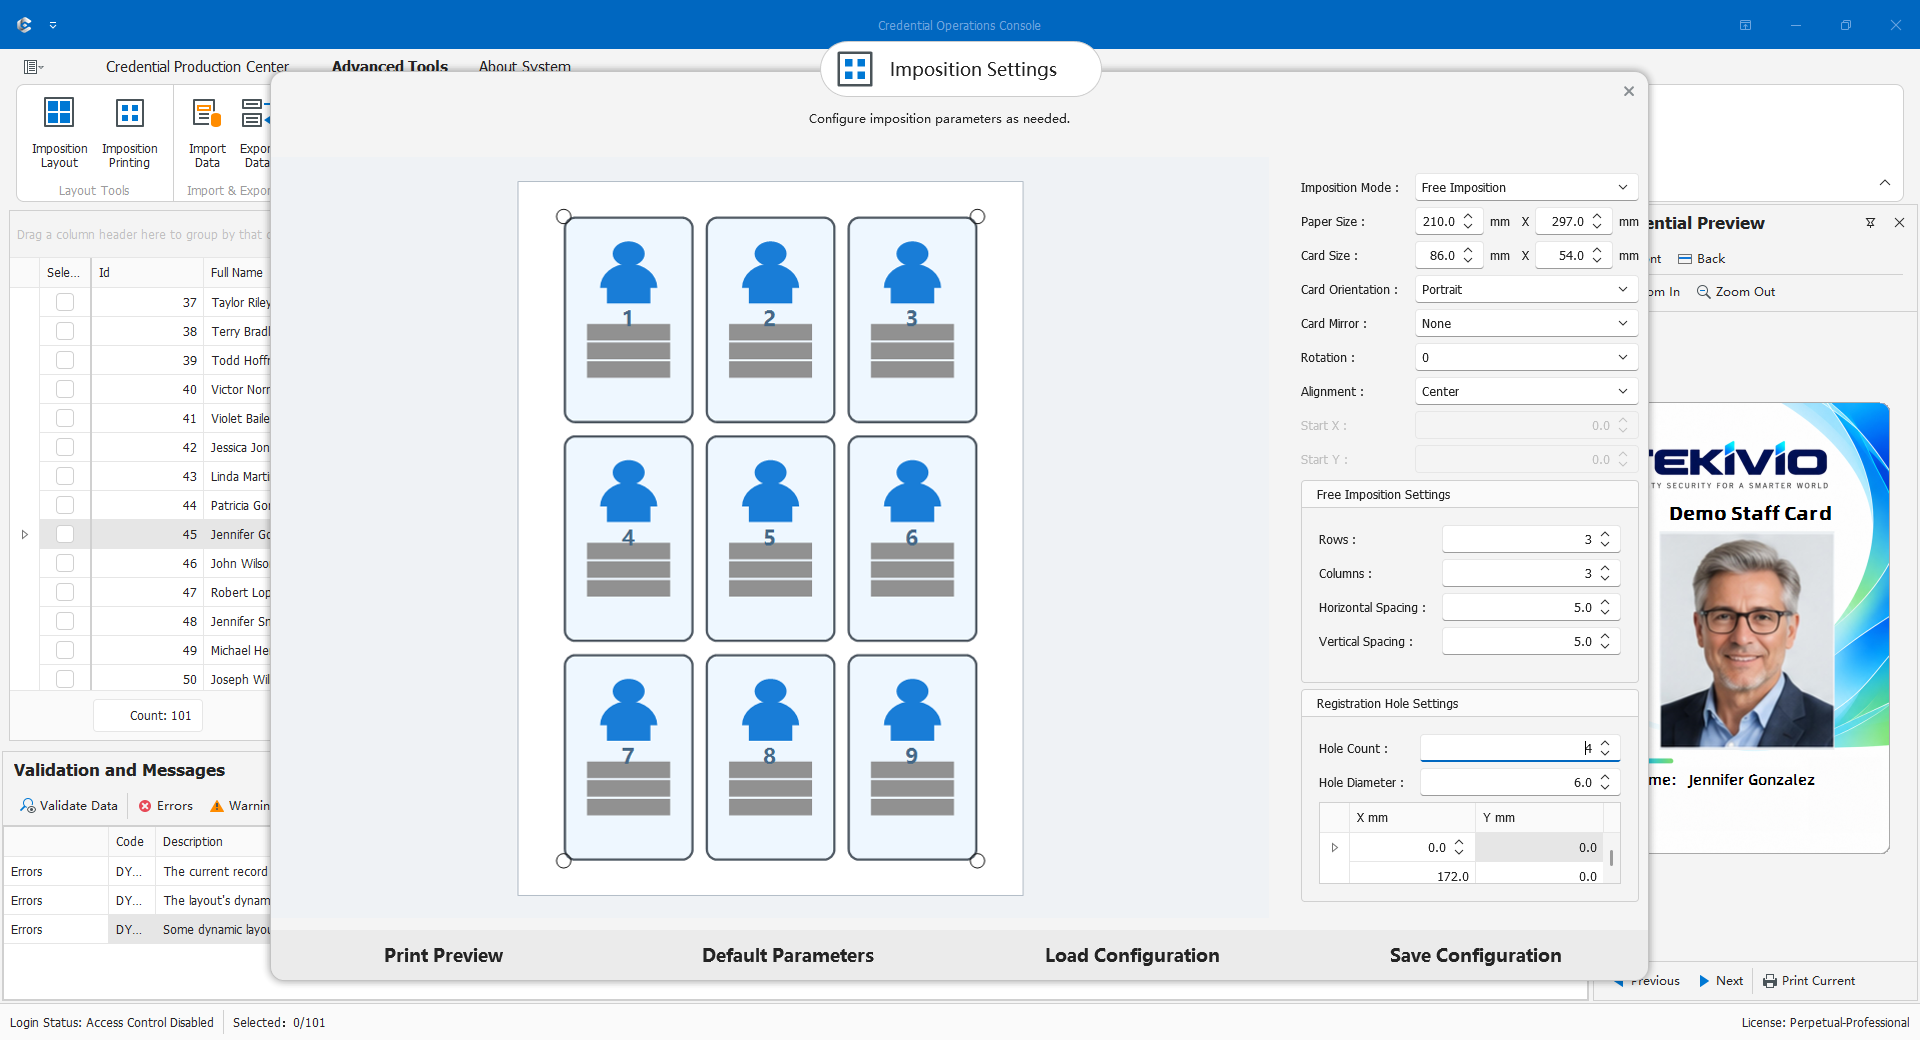
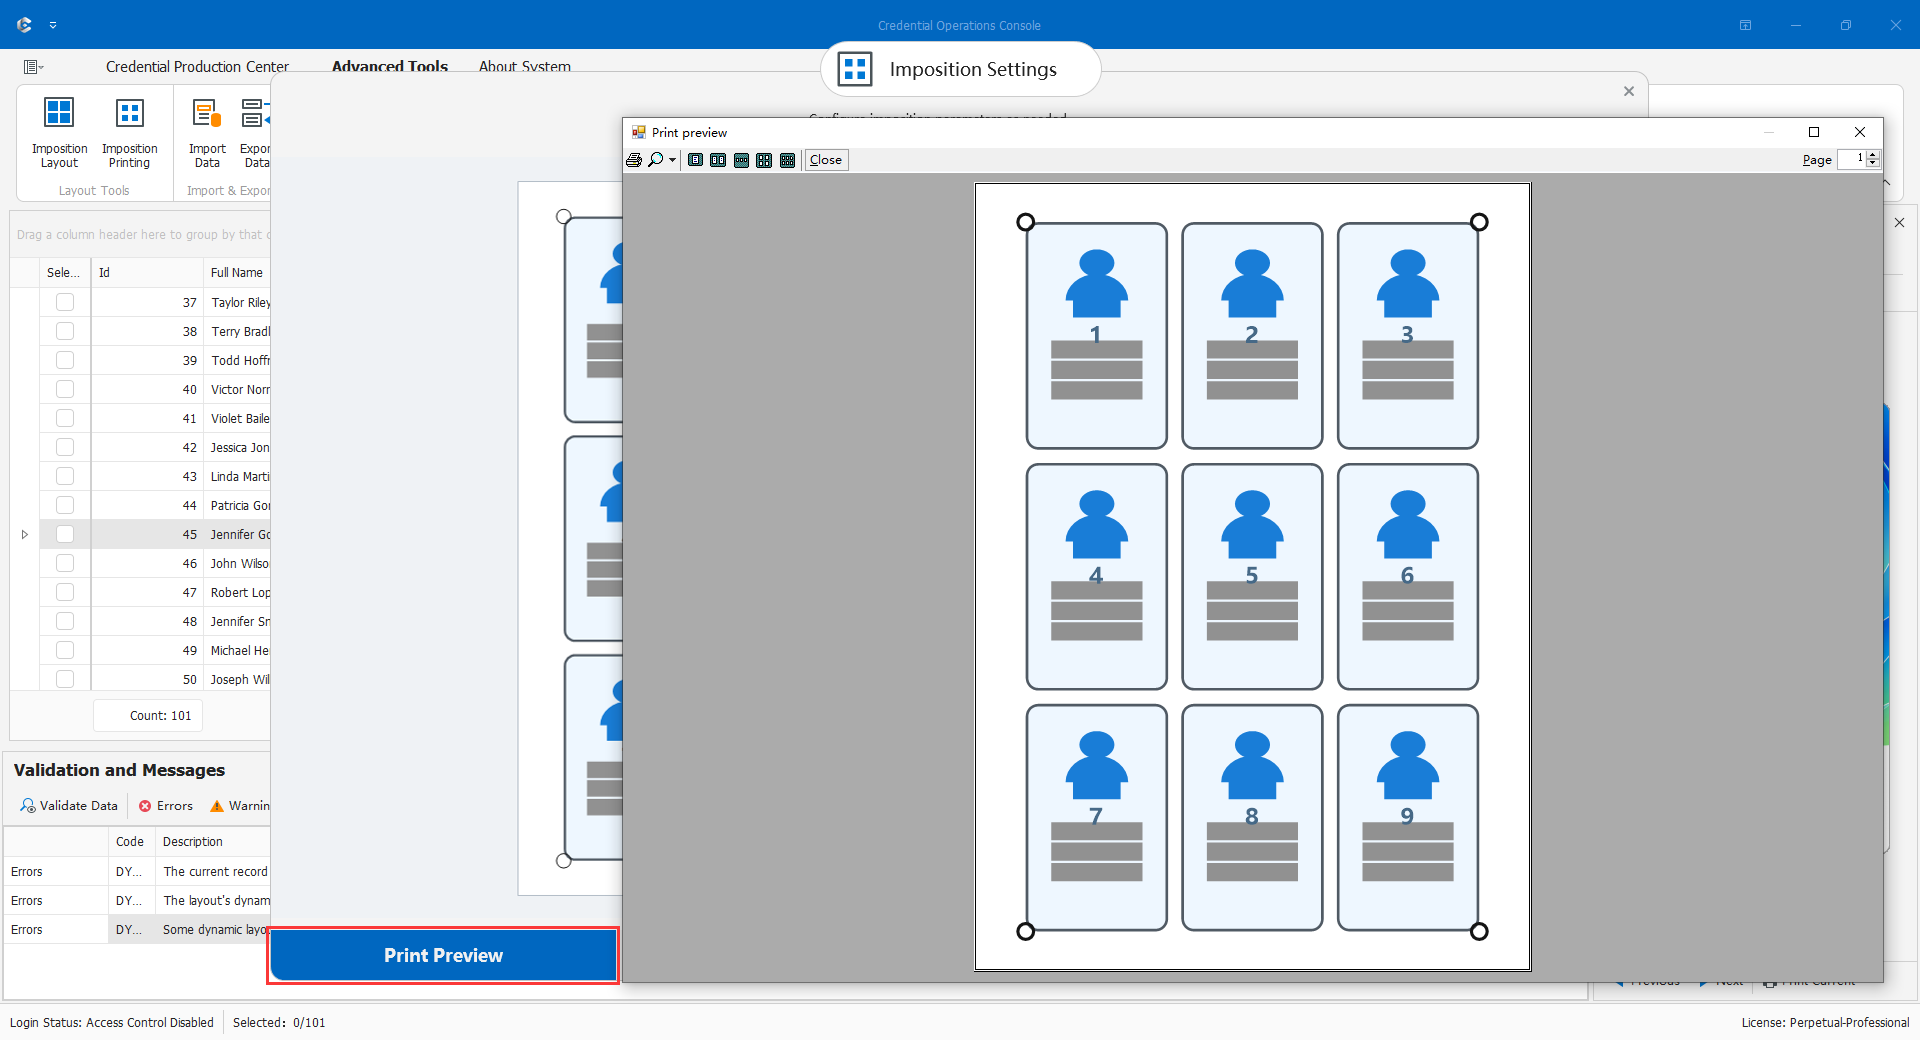
Capacity is rows multiplied by columns. A 2-by-3 sheet holds six cards; 14 records require three sheets, with two occupied slots in the final sheet. Horizontal and vertical gaps control columns and rows, not object coordinates in the individual design. Recheck overall size, rotation, alignment, and holes after grid changes. Test a sheet and first/last positions against driver paper, scaling, and printable margins.
5.7.3 Parameters
- Paper size is the output sheet's width/height in millimeters, matching stock and driver.
- Card size/orientation must match the actual layout; changing the sample tool does not redesign production cards.
- Two-Up or Free enables its corresponding gap/grid controls.
- Overall rotation is 0, 90, 180, or 270 degrees; check rotated bounds.
- Card mirroring may be none, horizontal, vertical, or both. It is not rotation; test text/codes for the actual process.
- Overall alignment is center, corners, or custom.
- Custom X/Y locates the group relative to the sheet's top-left in millimeters; other alignment modes should not be fine-tuned through inactive coordinates.
- Two-Up uses one gap; Free uses independent horizontal/vertical gaps. Zero means touching boundaries, not error-free hardware.
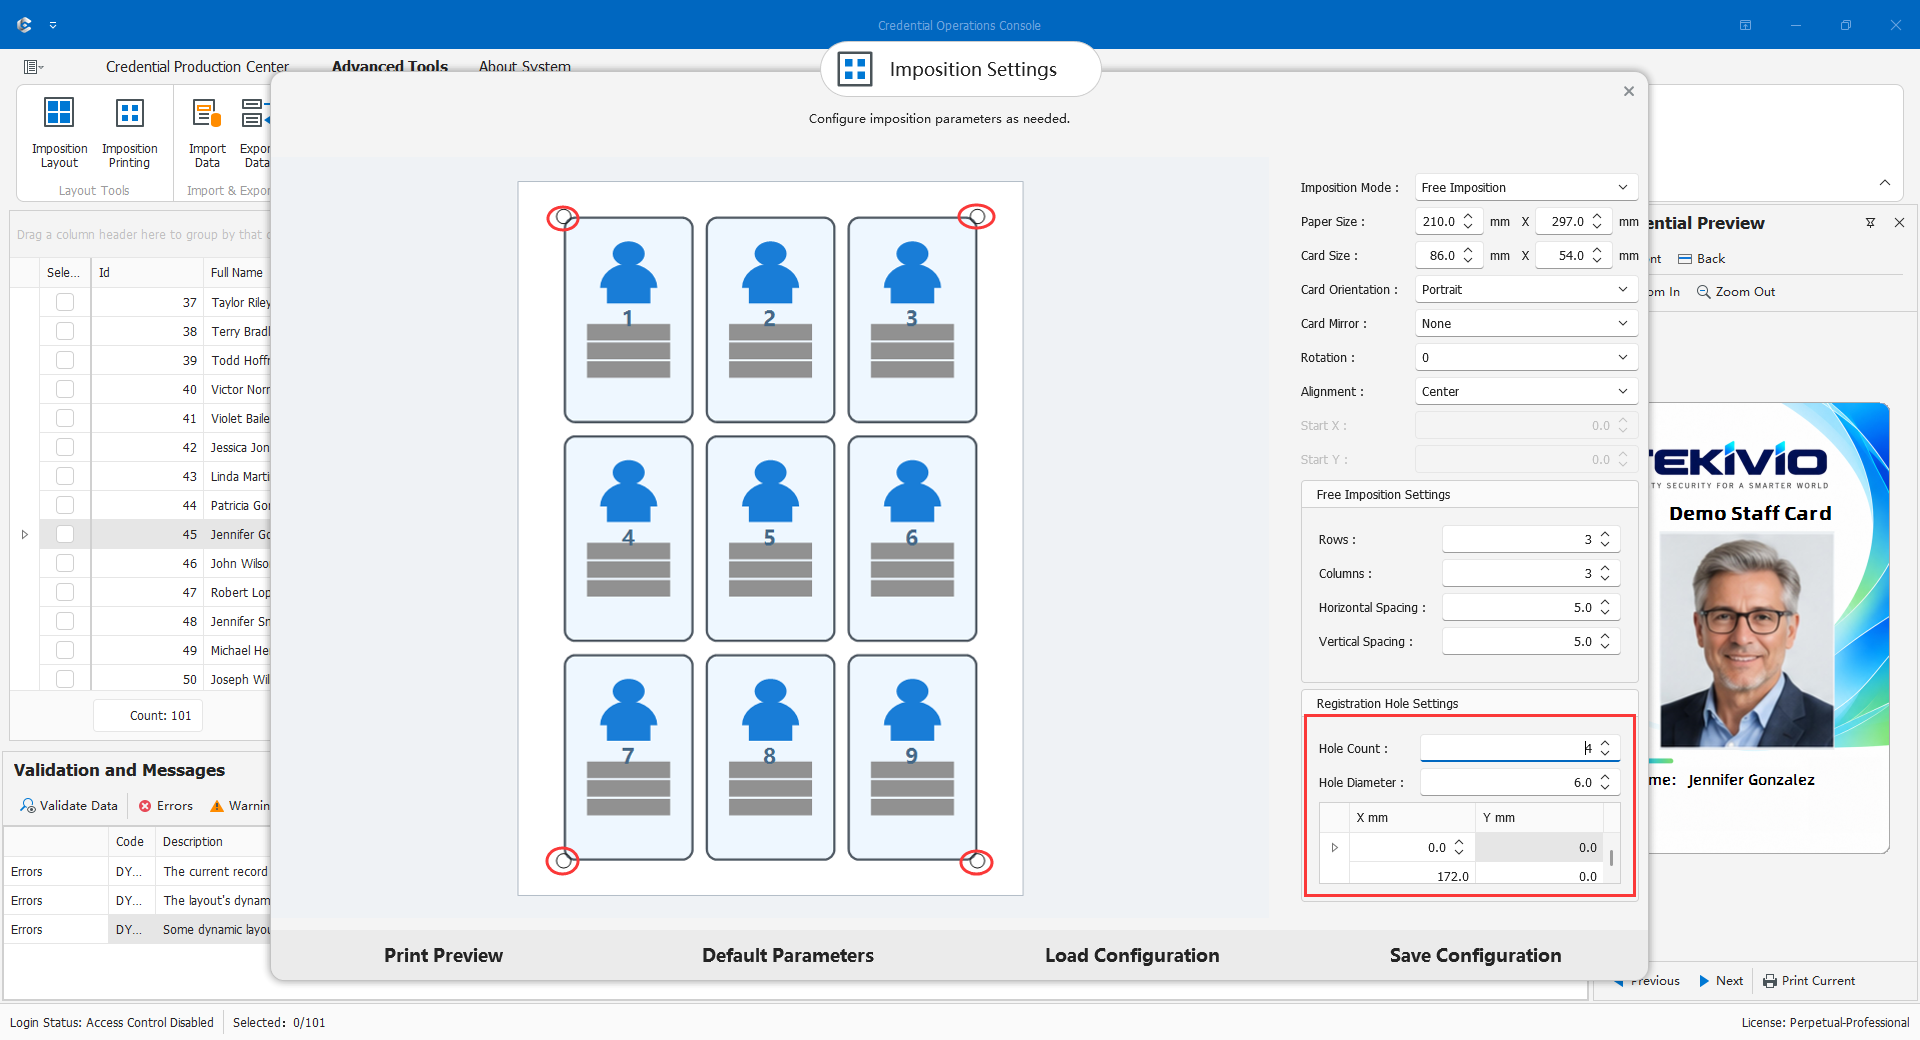
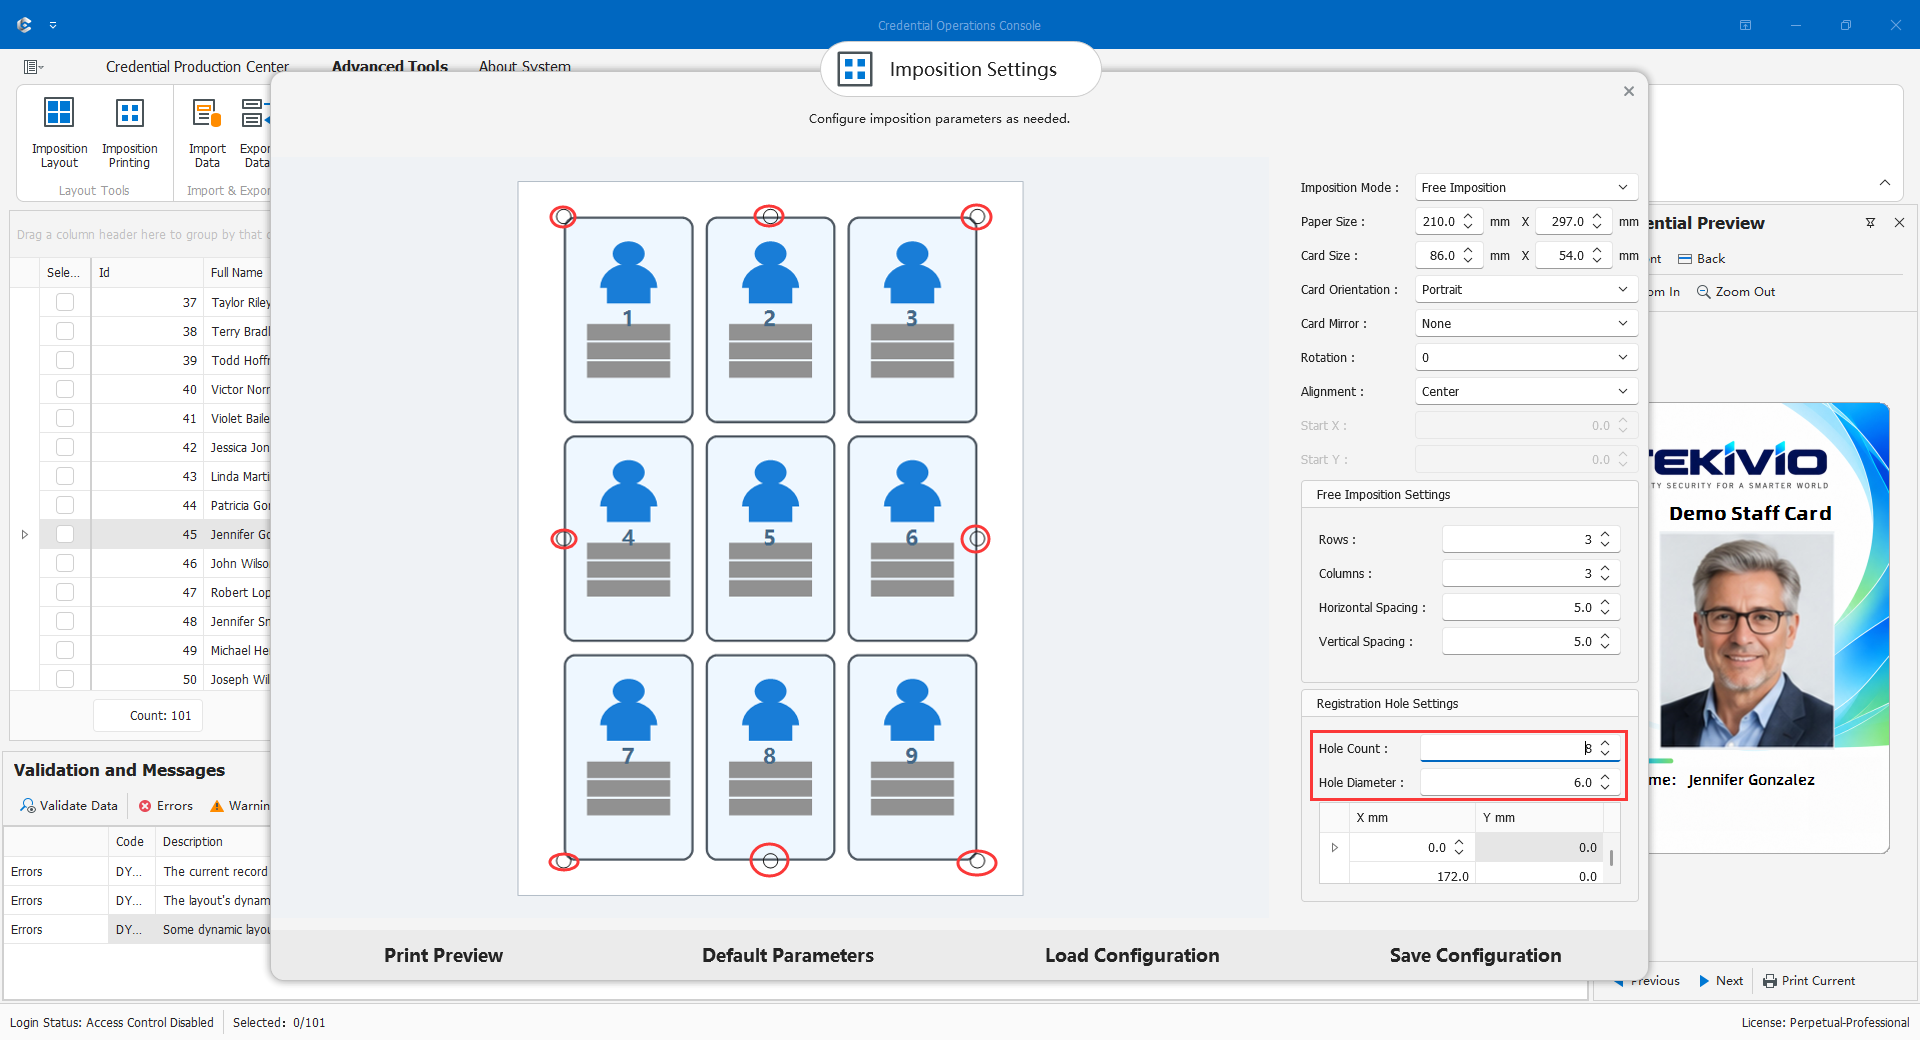
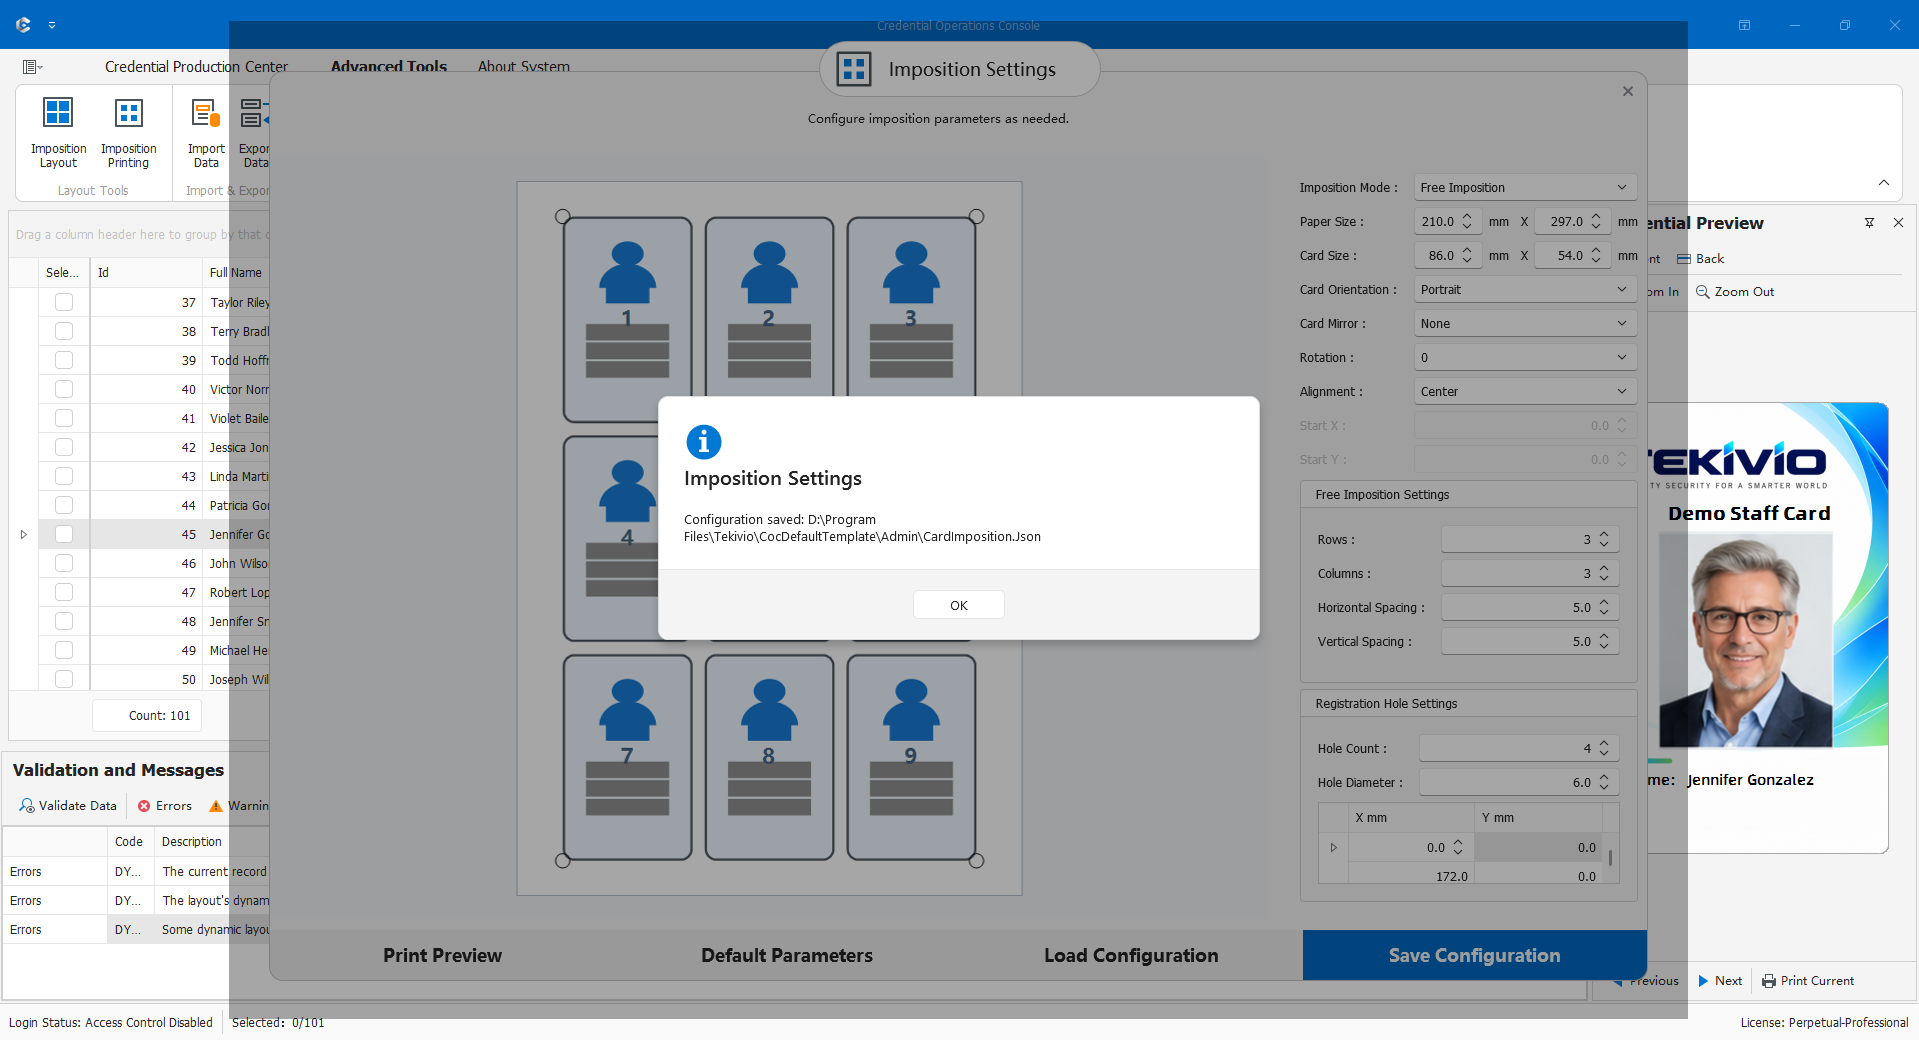
- Registration holes have count, diameter, and coordinates.
Do not mix pixels and millimeters. Check copies in both job and driver to avoid multiplication. Allowed input ranges do not make every combination printable.
5.7.4 Tool and Live Preview
Open the tool for the current user, verify paper/card dimensions, choose a mode, and adjust while inspecting the sample boundaries. Use Print Preview; load verified parameters if appropriate. Default Parameters is a starting point, not a guaranteed process setting.
Save Parameters, then return to COC, check the intended currently displayed records, choose one side, and run Imposition Printing. The task reads saved settings, not merely a previously displayed preview. Missing configuration prompts for saving first. Recheck after user, paper, printer, or layout-size changes. Geometry preview does not certify actual people/photos/codes or hardware calibration.
5.7.5 Registration Holes
Use the approved process specification for hole count (0 when unnecessary), diameter, and each X/Y coordinate, in millimeters. Check against paper edges, card content, and fixtures, inspect the full preview, recheck after changes, save, and physically measure a paper trial before approval.
Printed registration marks do not mean the printer can punch holes. Verify rotation, clearances, and finishing against the actual tool, trial, and process document rather than screen distances.